Windows 10
Windows 10 has no built-in encrypted DNS, so this sets plain DNS on your network adapter. For encrypted DNS on Windows 10, set up your browser as well, or set DNS on your router to cover the whole network.
Set it up
Section titled “Set it up”You’ll need these addresses:
| Server | IPv4 | IPv6 |
|---|---|---|
| us-dns1 | 45.33.24.129 | 2600:3c00::f03c:94ff:fe97:f94f |
| Server | IPv4 | IPv6 |
|---|---|---|
| fr-dns1 | 51.158.99.7 | 2001:bc8:710:1efa:dc00:ff:fe34:a339 |
| fr-dns2 | 163.172.180.231 | 2001:bc8:710:1efb:dc00:ff:fe34:a1d7 |
| Server | IPv4 | IPv6 |
|---|---|---|
| sg-dns1 | 139.59.219.245 | 2400:6180:0:d0::f7:1001 |
| sg-dns2 | 139.59.218.207 | 2400:6180:0:d0::f5:7001 |
| Server | IPv4 | IPv6 |
|---|---|---|
| jp-dns1 | 103.29.68.118 | 2400:8902::f03c:92ff:fe3e:46cd |
| jp-dns2 | 172.105.195.19 | 2400:8902::f03c:94ff:fee9:70 |
-
Press Win + R, type
ncpa.cpland press Enter. This opens Network Connections.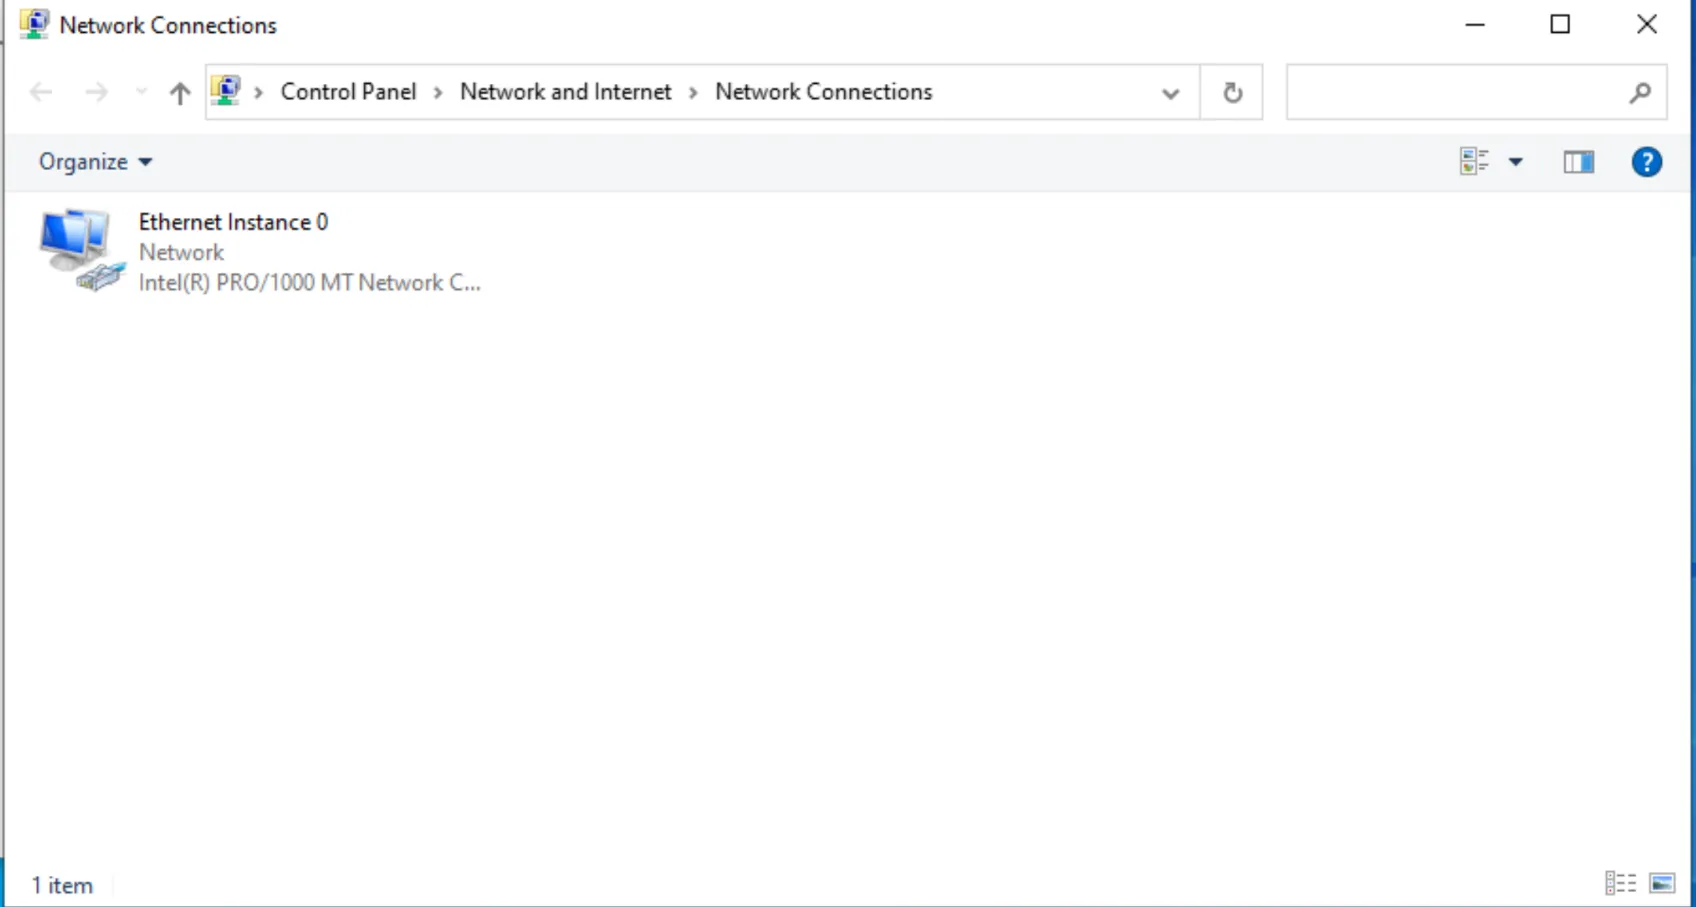
-
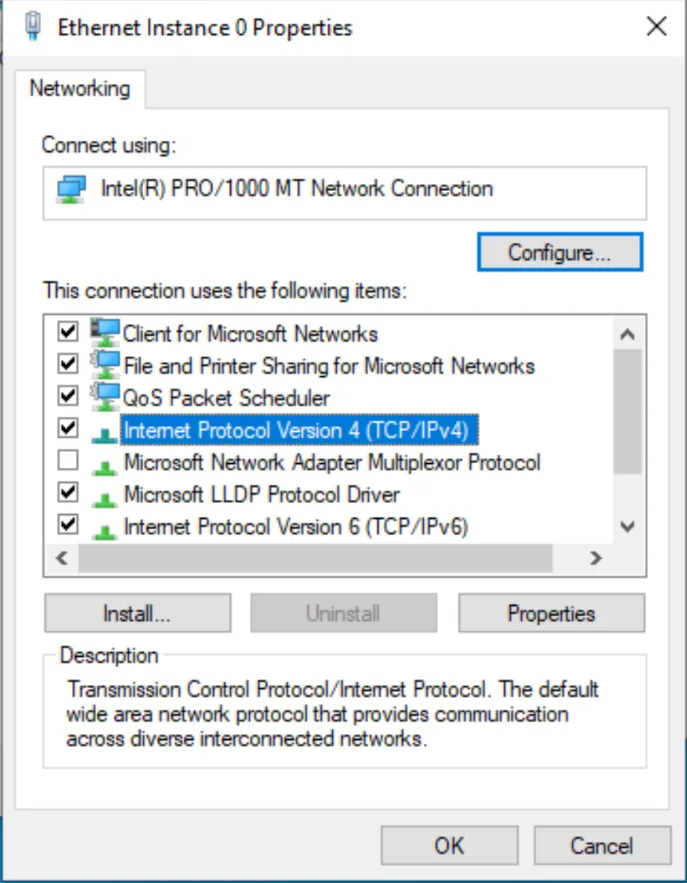
Right-click the adapter you use (Wi-Fi or Ethernet) and choose Properties.
-
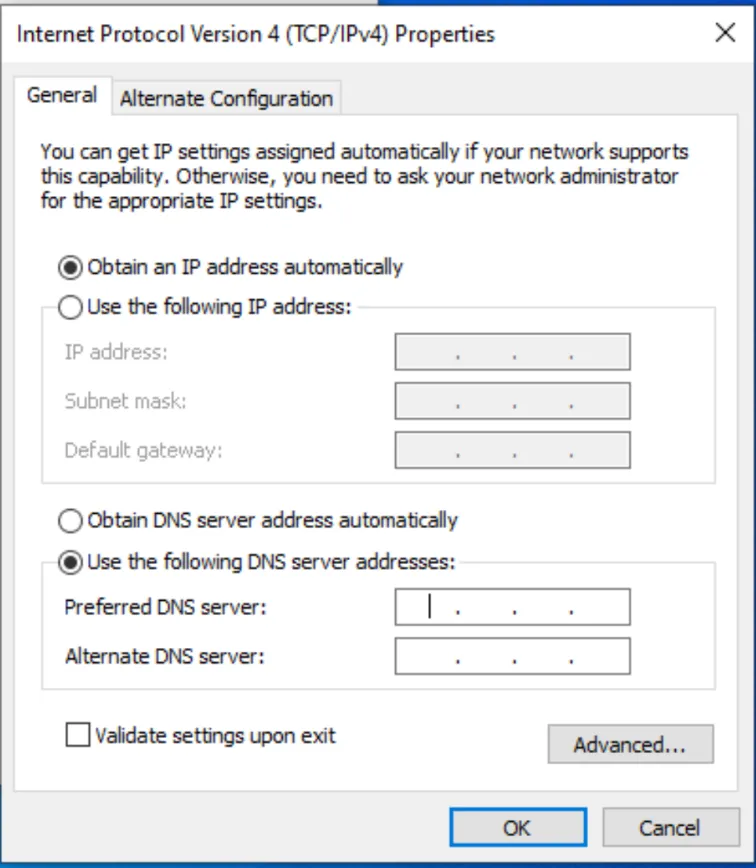
Select Internet Protocol Version 4 (TCP/IPv4) and click Properties. Choose Use the following DNS server addresses, and enter the two IPv4 addresses as the preferred and alternate DNS servers. Click OK.
-
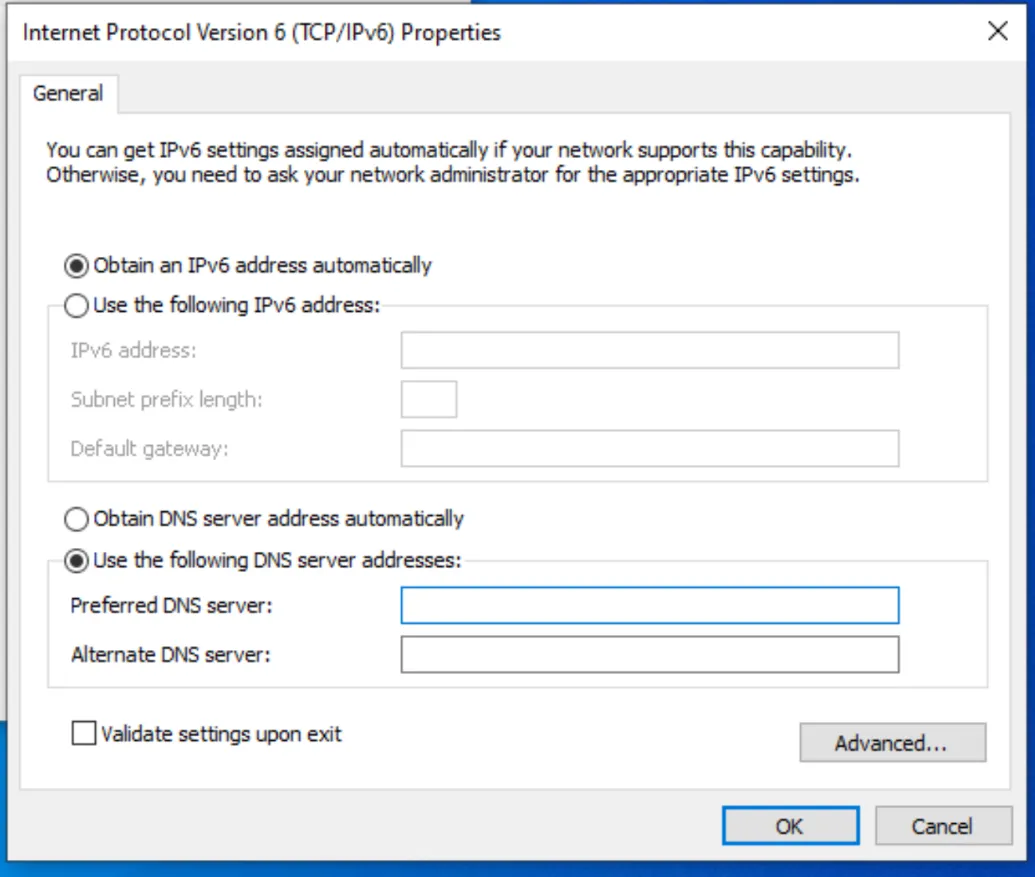
Select Internet Protocol Version 6 (TCP/IPv6) and do the same with the two IPv6 addresses.
-
Click OK to close the adapter properties. Then open Command Prompt and run
ipconfig /flushdnsto clear old lookups.
Undo it
Section titled “Undo it”Go back to both protocol properties and choose Obtain DNS server address automatically.